or how to use Ghidra to analyse a STM32F1 Series ARM Cortex M3 uController firmware
Ninebot eScooters are renowned globally for their robustness and reliability. However, they come with certain restrictions tailored to the market in which they’re sold. A notable example is the speed limit, which varies by country. In this post, we’ll delve into the firmware to understand how these restrictions are applied and how they might be modified.
Ninebot scooters feature three distinct microcontrollers (uControllers):
The dashboard uController, handling Bluetooth communication, speed control, on/off switch, etc.
The drive controller uController, managing motor control and parameters such as speed and current.
The battery management system (BMS) uController, overseeing battery health and usage.
To explore how speed limits are implemented across different markets, we’ll focus on the drive controller.
These uControllers typically don’t run conventional operating systems like Windows, Linux, Android, or FreeRTOS. Instead, they operate on what’s often referred to as a bare-metal application.
In this post, we will look into reverse-engineering such firmware implementations.
How to Obtain the Firmware
Getting the firmware isn’t straightforward, as most uControllers have readout protection, preventing the internal flash memory—where the code is stored—from being read. I’ll cover this more in a future post, but here’s a summary of potential attack vectors:
Unprotected flash memory (unlikely).
Interception of the manufacturer’s update process, which might contain the bitfile. However, these bitfiles are sometimes encrypted, so this isn’t always viable.
Hardware attacks, like glitching, can be effective even on modern uControllers. Specialized hardware, often controlled by FPGAs, briefly disrupts the uController’s power supply. This can cause unexpected behavior, such as skipping over security checks. Let us have a look at a very simple example: If (!debug_release) {Lock_firmware()}
For example, if we disrupt the power supply when the uController is checking debug_release, we might bypass the Lock_firmware() function.
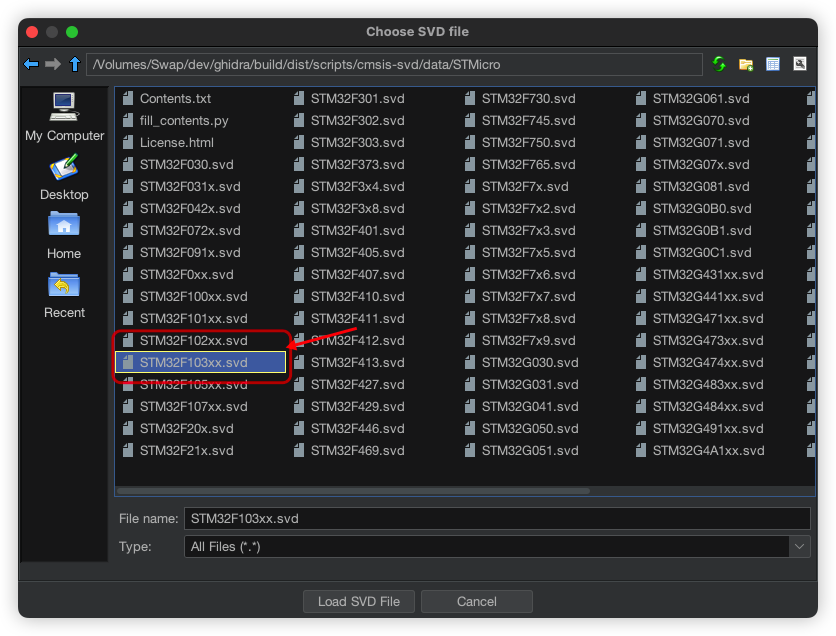
The Ninebot scooter uses a STM32F103, a widely-utilized basic uController for embedded systems, featuring a USB controller, timers, I2C, CAN, and UART interfaces. Given Ninebot’s purchasing volume, the expected cost for this uController is between 1-2 EUR. The datasheet for this uController is linked below, which will be referenced frequently in understanding reverse engineering.
Starting the Analysis
Assuming we’ve obtained the binary raw file by one of the aforementioned methods or downloaded it from the internet, we can begin analysis. A link to the firmware will be provided at the end of this post.
A great tool for analysis is Ghidra, developed by the NSA and now open-sourced for security researchers, with strong community support.
Workflow for STM32
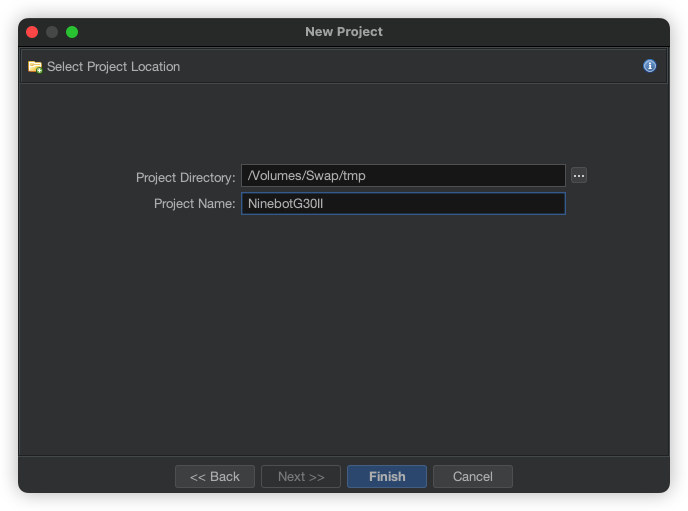
Start a new project
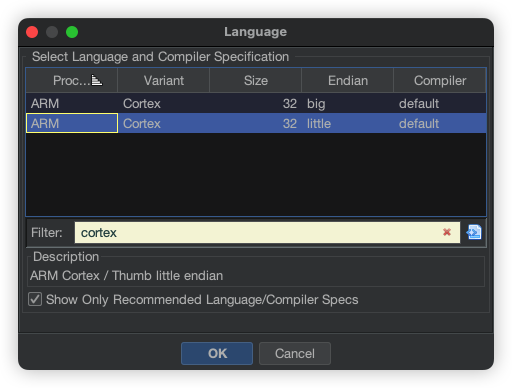
For STM32 select Cortex / 32 / little
Press ok to start the first analysis
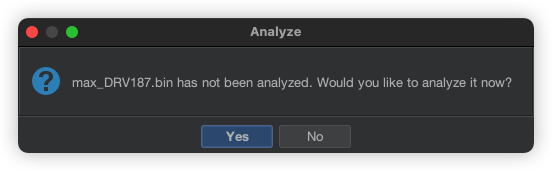
Double-click on the new bin file and press Yes when you are asked for the analysis
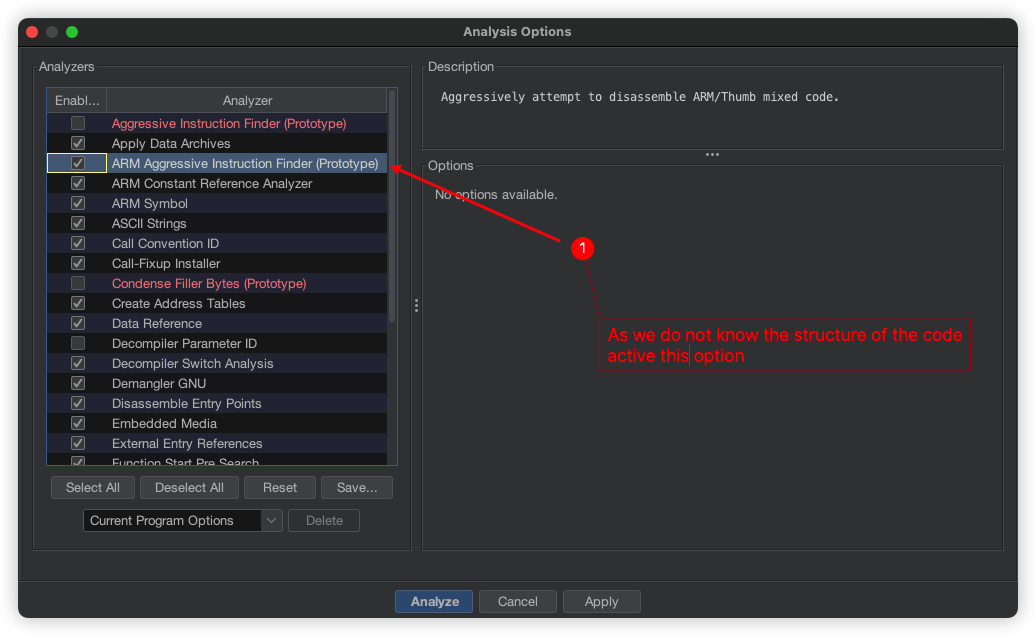
Activate the ARM Aggressive Instruction finder and press Analyze
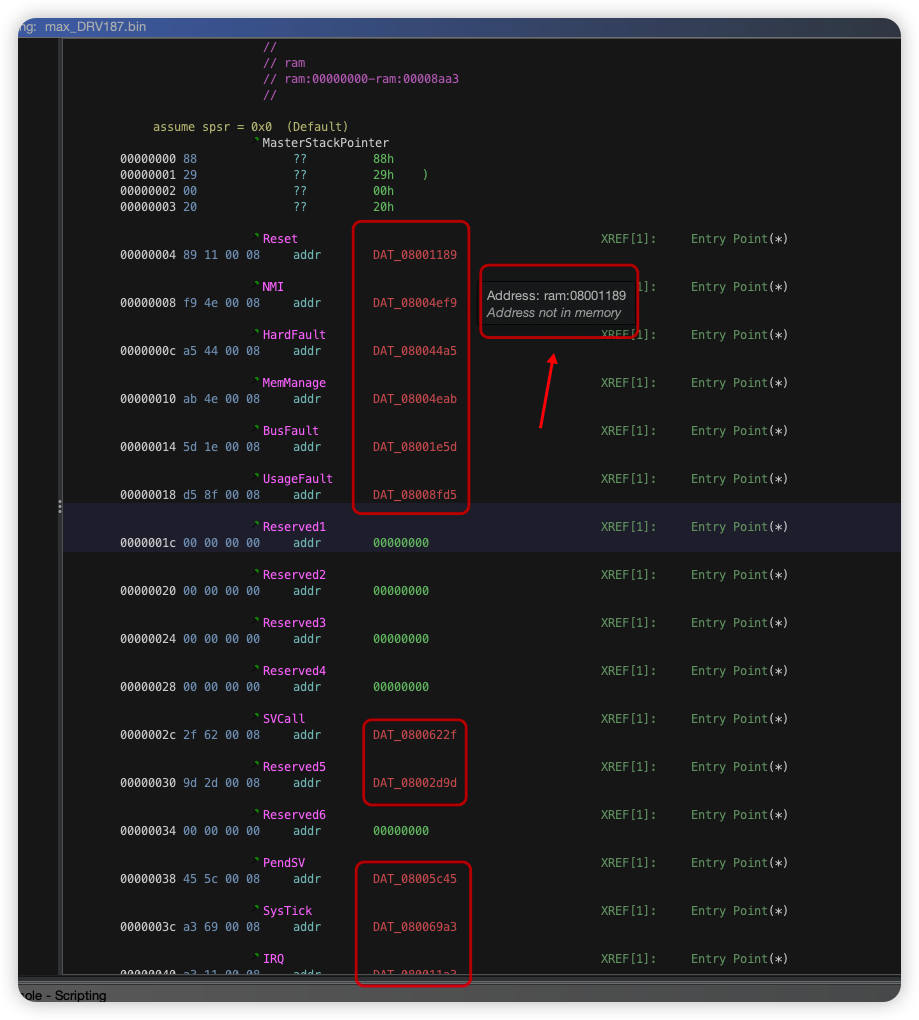
In Ghidra, you’ll find many addresses marked in red, indicating ‘Address not in memory.’ Remember our earlier discussion about bare-metal applications? Ghidra is unaware of the memory structure, which we can clarify by consulting the datasheet.
Here’s a snapshot of the memory overview:
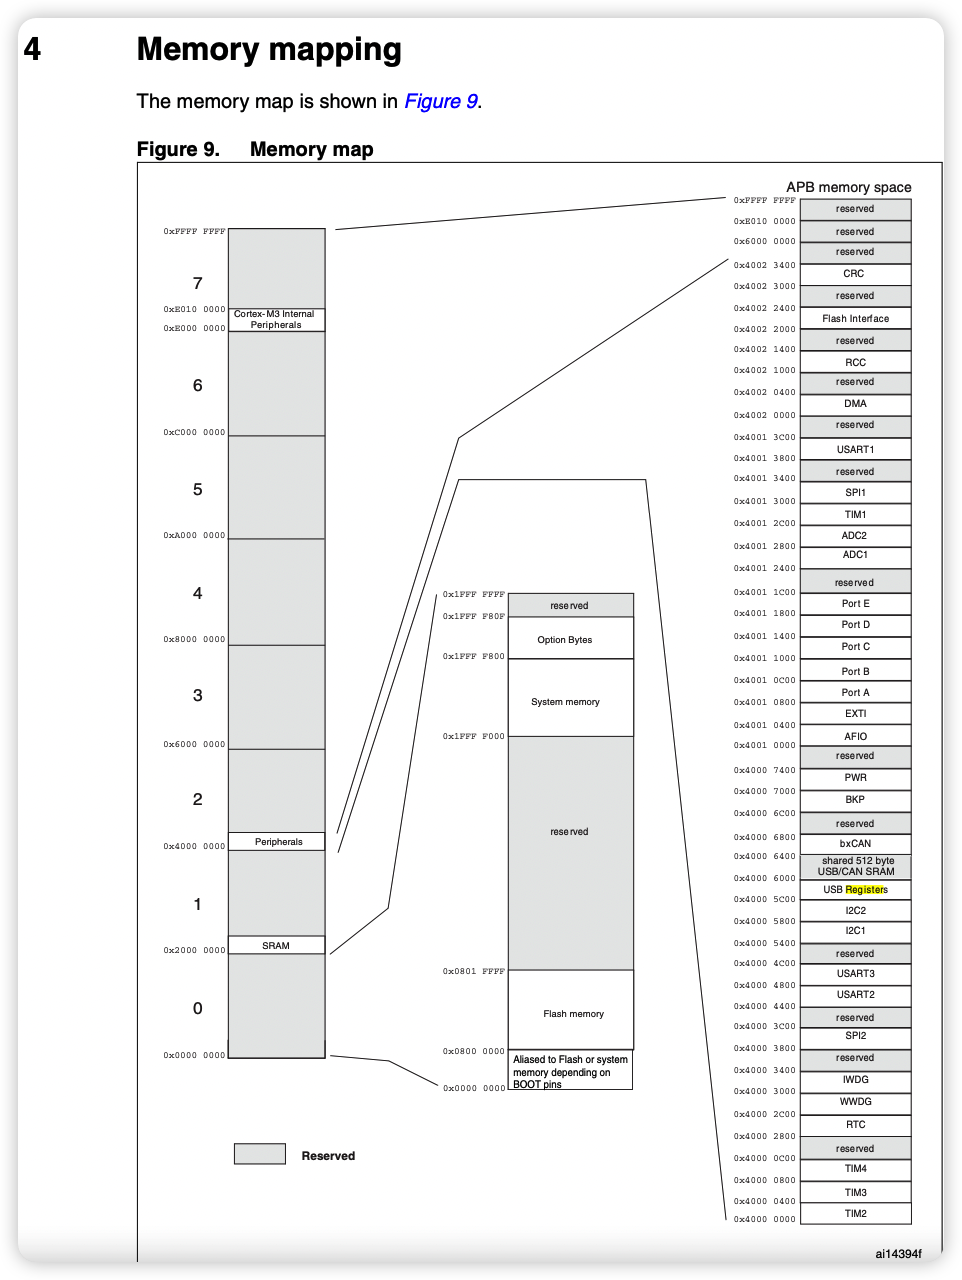
Flash memory is mapped to 0x0800 0000.
SRAM is mapped to 0x2000 0000.
Peripherals, like GPIOs and ADCs, to 0x4000 0000.
This is known as memory-mapped I/O, which allows the software to configure and access various parts of the uController.
When we map our firmware binary, it must be aligned to 0x0800 0000. However, it’s important to consider the bootloader utilized by Ninebot, which occupies a portion of the flash memory.
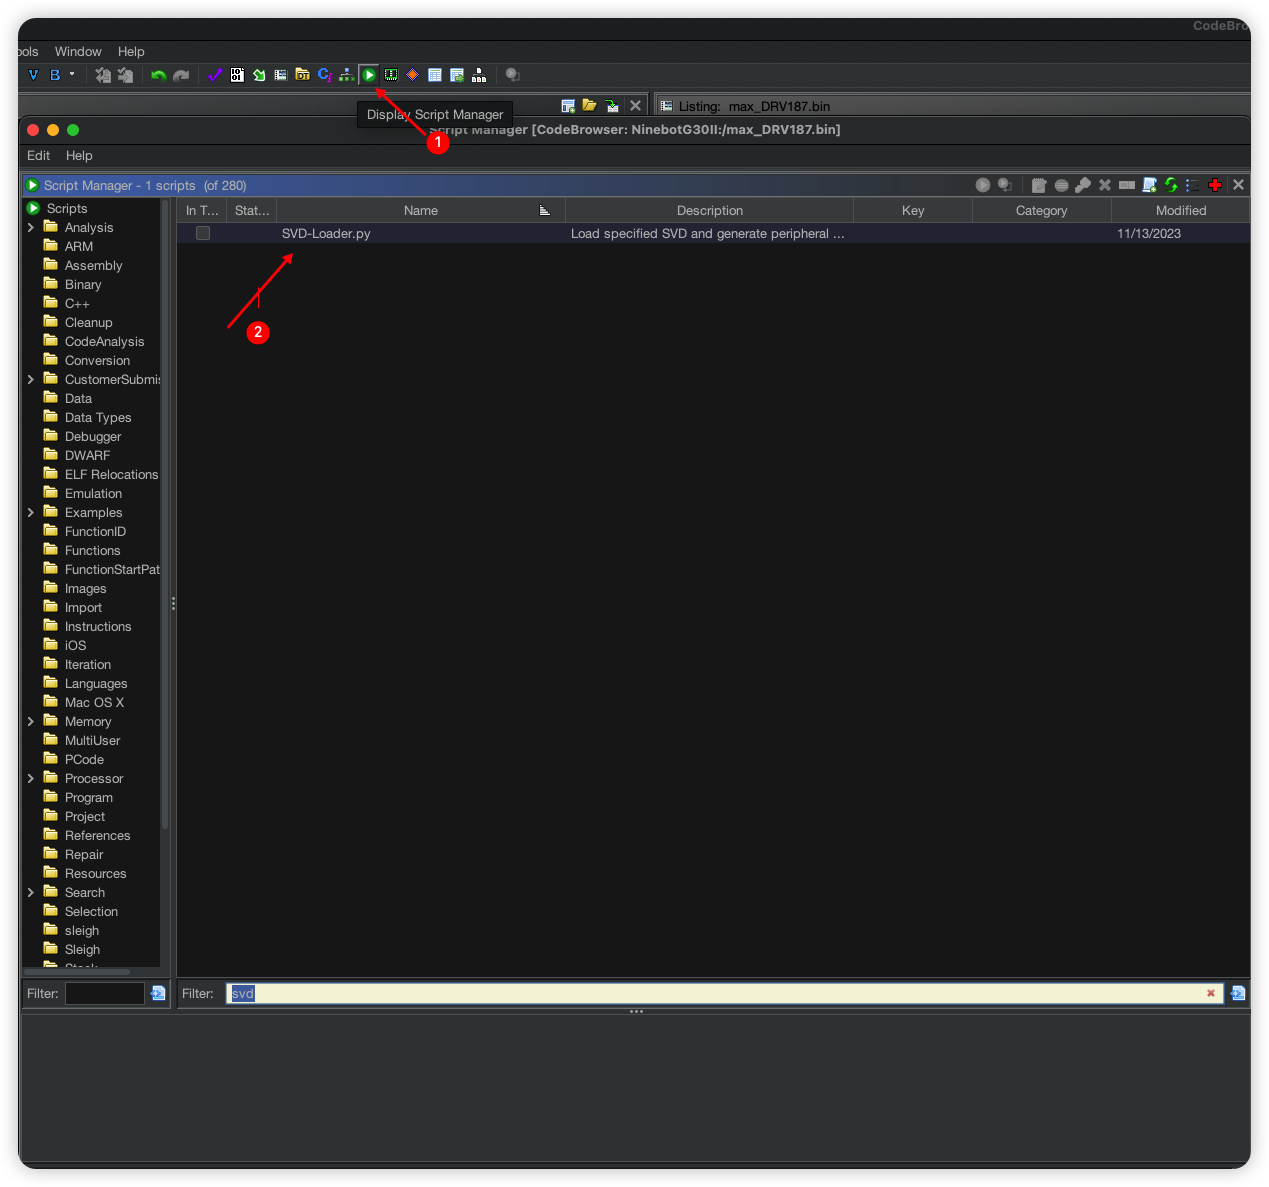
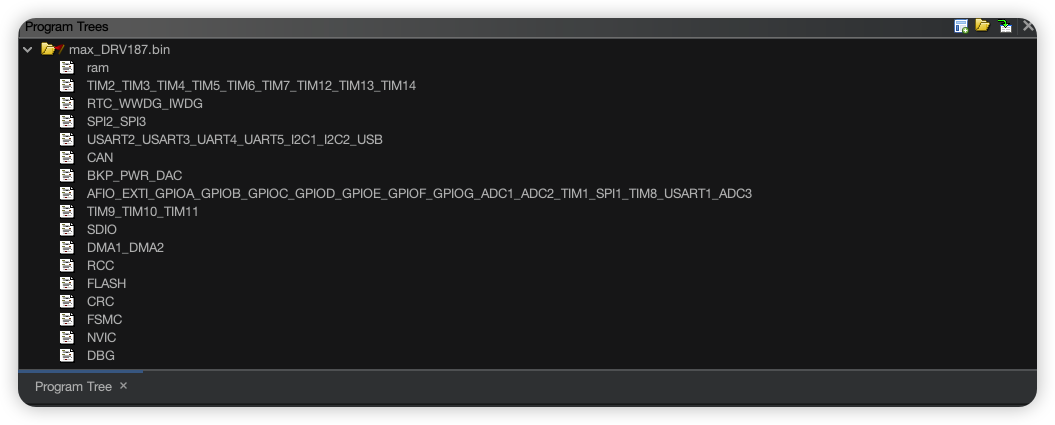
According to this map, we must position our firmware binary at 0x08001000. We will also map the SRAM at 0x2000 0000 and the peripherals. For mapping peripherals, there’s an excellent Ghidra tool that greatly simplifies this process: https://github.com/leveldown-security/SVD-Loader-Ghidra
Memory map after loading the SVD file
After having everything together, we can start 🥳
4 thoughts on “Ninebot Max G30 II firmware patching”
Good mix of technical details and practical advice. The linkz to datasheets and firmware are a nice touch for anyone wanting to dive deeper into firmware engineering. ⭐️⭐️⭐️⭐️⭐️
The article overlooks the risks and legal implications of firmware modification. It needs to address the potential for voiding warranties and safety concerns associated with unauthorized tampering of eScooter firmware.


Really useful info on how to analyze the Ninebot Max using Ghidra. Didn’t know much about the STM32F1 Series ARM Cortex M3 before this.
Good mix of technical details and practical advice. The linkz to datasheets and firmware are a nice touch for anyone wanting to dive deeper into firmware engineering. ⭐️⭐️⭐️⭐️⭐️
The article overlooks the risks and legal implications of firmware modification. It needs to address the potential for voiding warranties and safety concerns associated with unauthorized tampering of eScooter firmware.
So in th end ..did anybody get more speed/power to th rear wheel.?
Just wondering